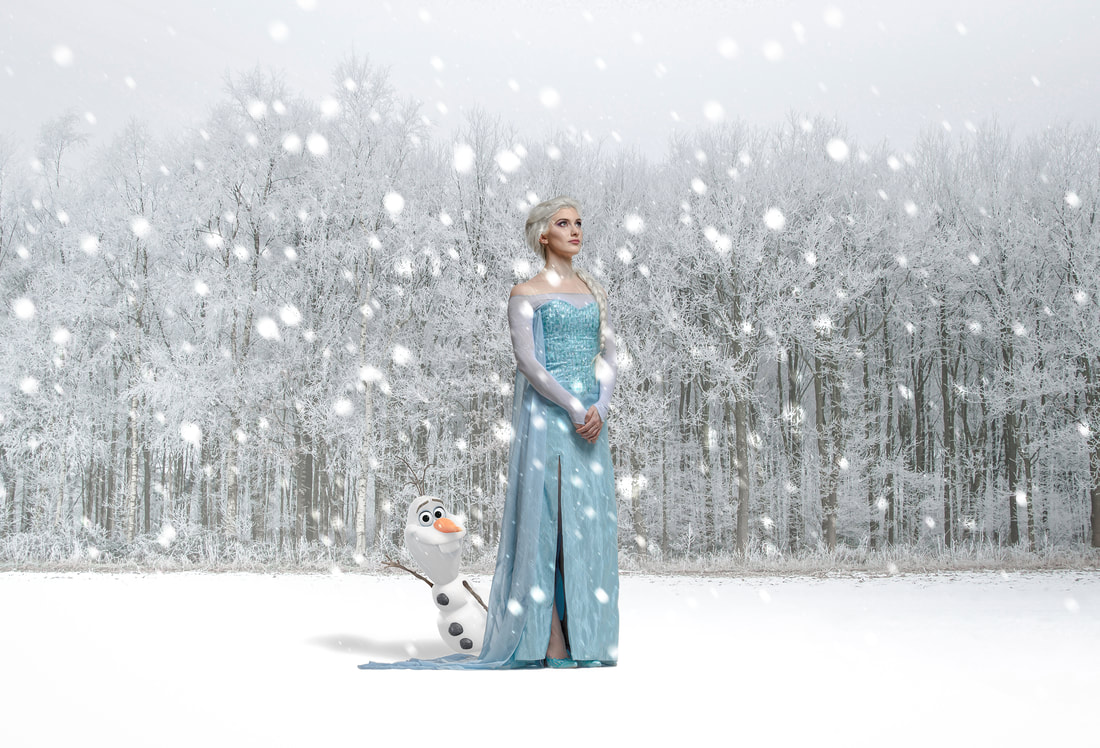
Photography By: Scott Free -- Makeup By: Elle Burgess -- Location: City of Perth Library & Chris Huzzards Studios
THE MAKING OF...
|
|
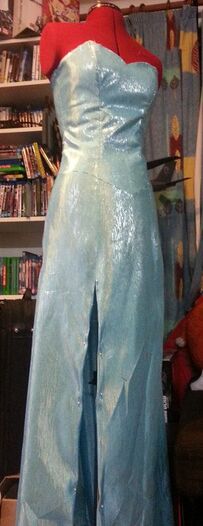
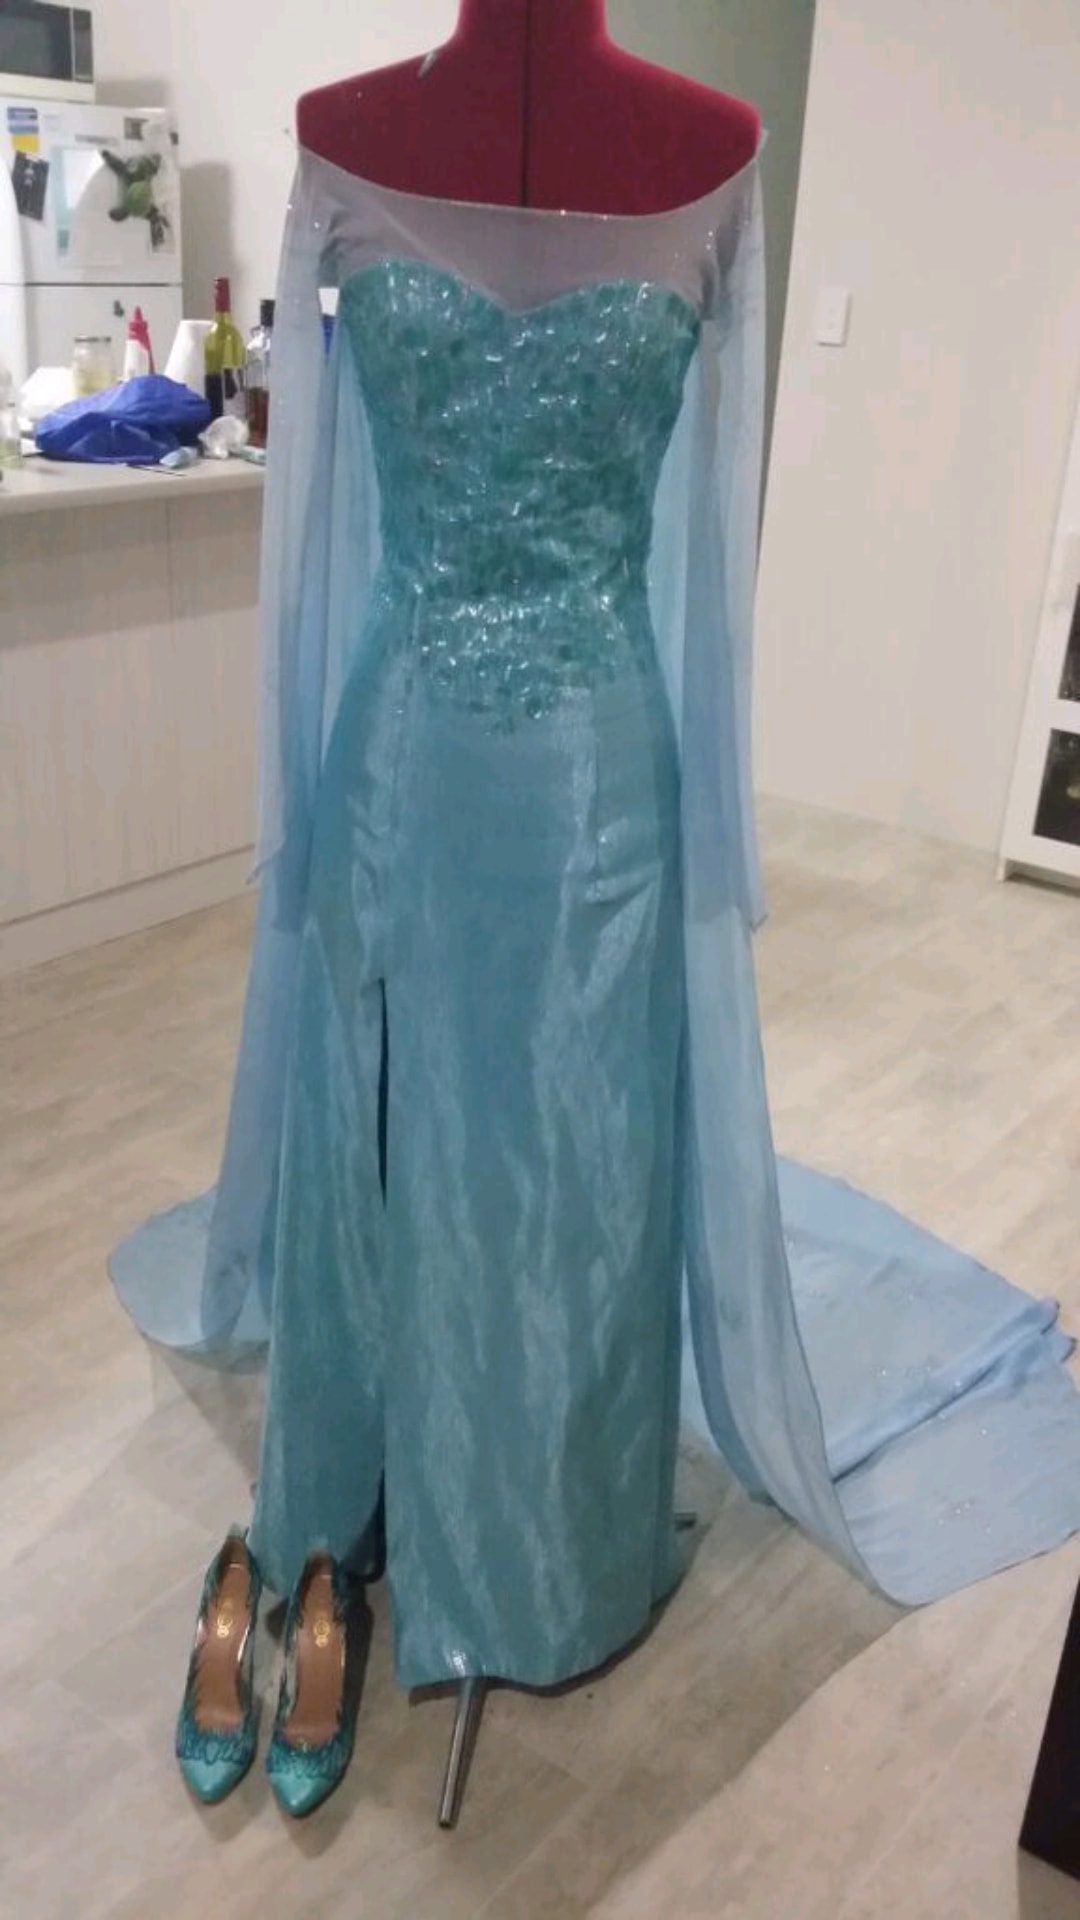
One of the things I knew right away with this project was that the Elsa dress was going to be a full dress, not a bodice and skirt. Having a separate bodice and skirt created a blunt line that cut the look in half, and I wanted something that flowed more from top to bottom.
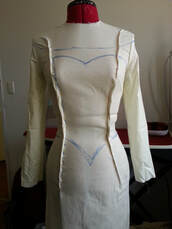
I started with my standard dress block, sewn in calico to my size and slapped it onto the mannequin for some reworking. |
|
From here it was a very basic one-two-dodge combination to pin/draw out the shaping, fitting and design lines I was after.
Once I got the shape I removed the calico from the mannequin and cut it up along the pinned/drawn lines to get my pattern pieces. I should note that in this case I didn't cut along the pointed bodice line that you can see...I was just drawing...and imagining...so ignore that bit. Using those pattern pieces, I cut out my dress (floor length) and got to sewing that baby together, facing, interfacing, boning, split and all. |

|
|
|
|
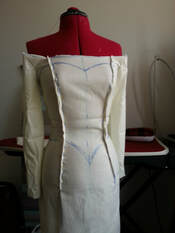
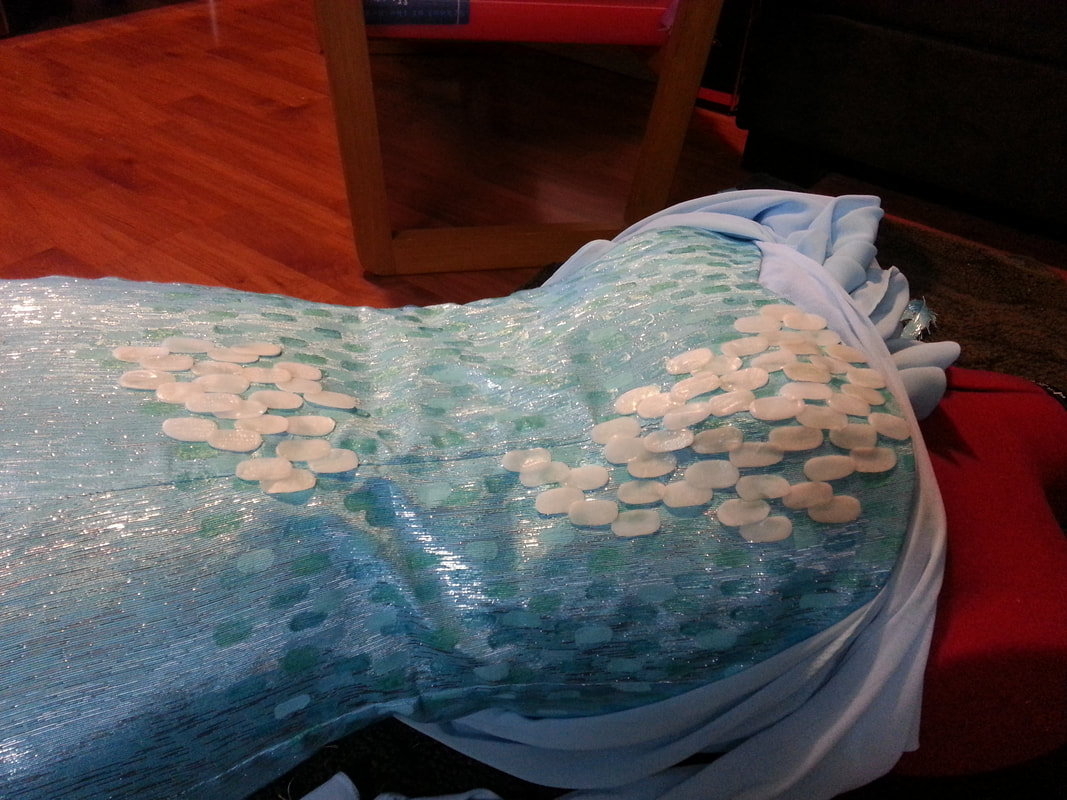
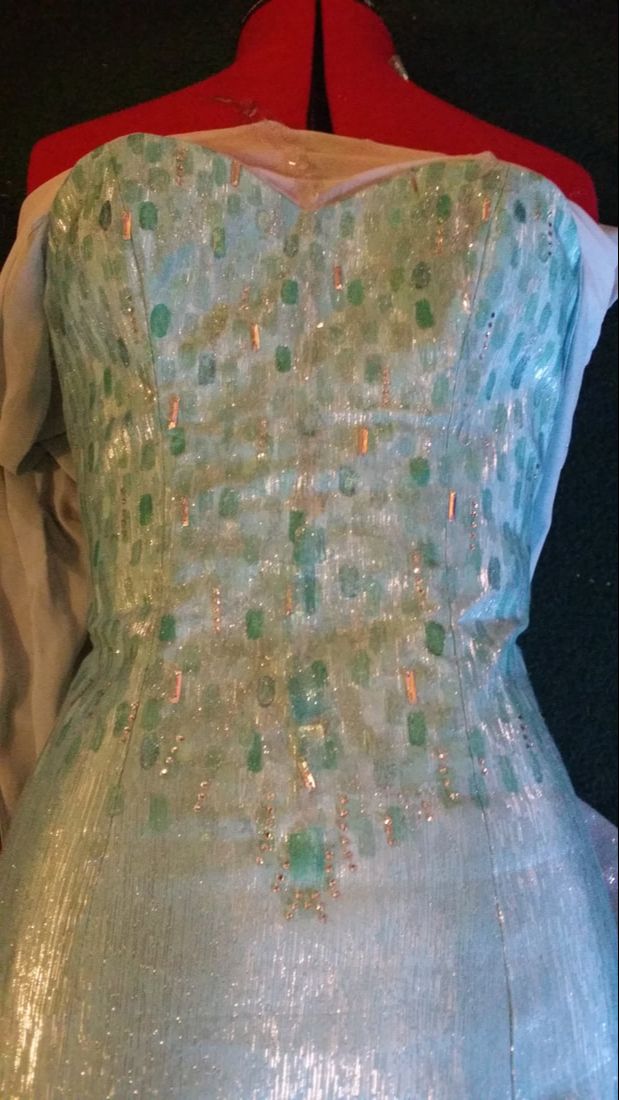
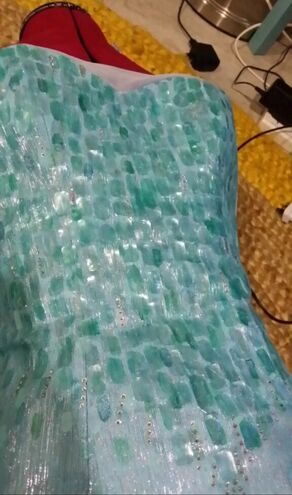
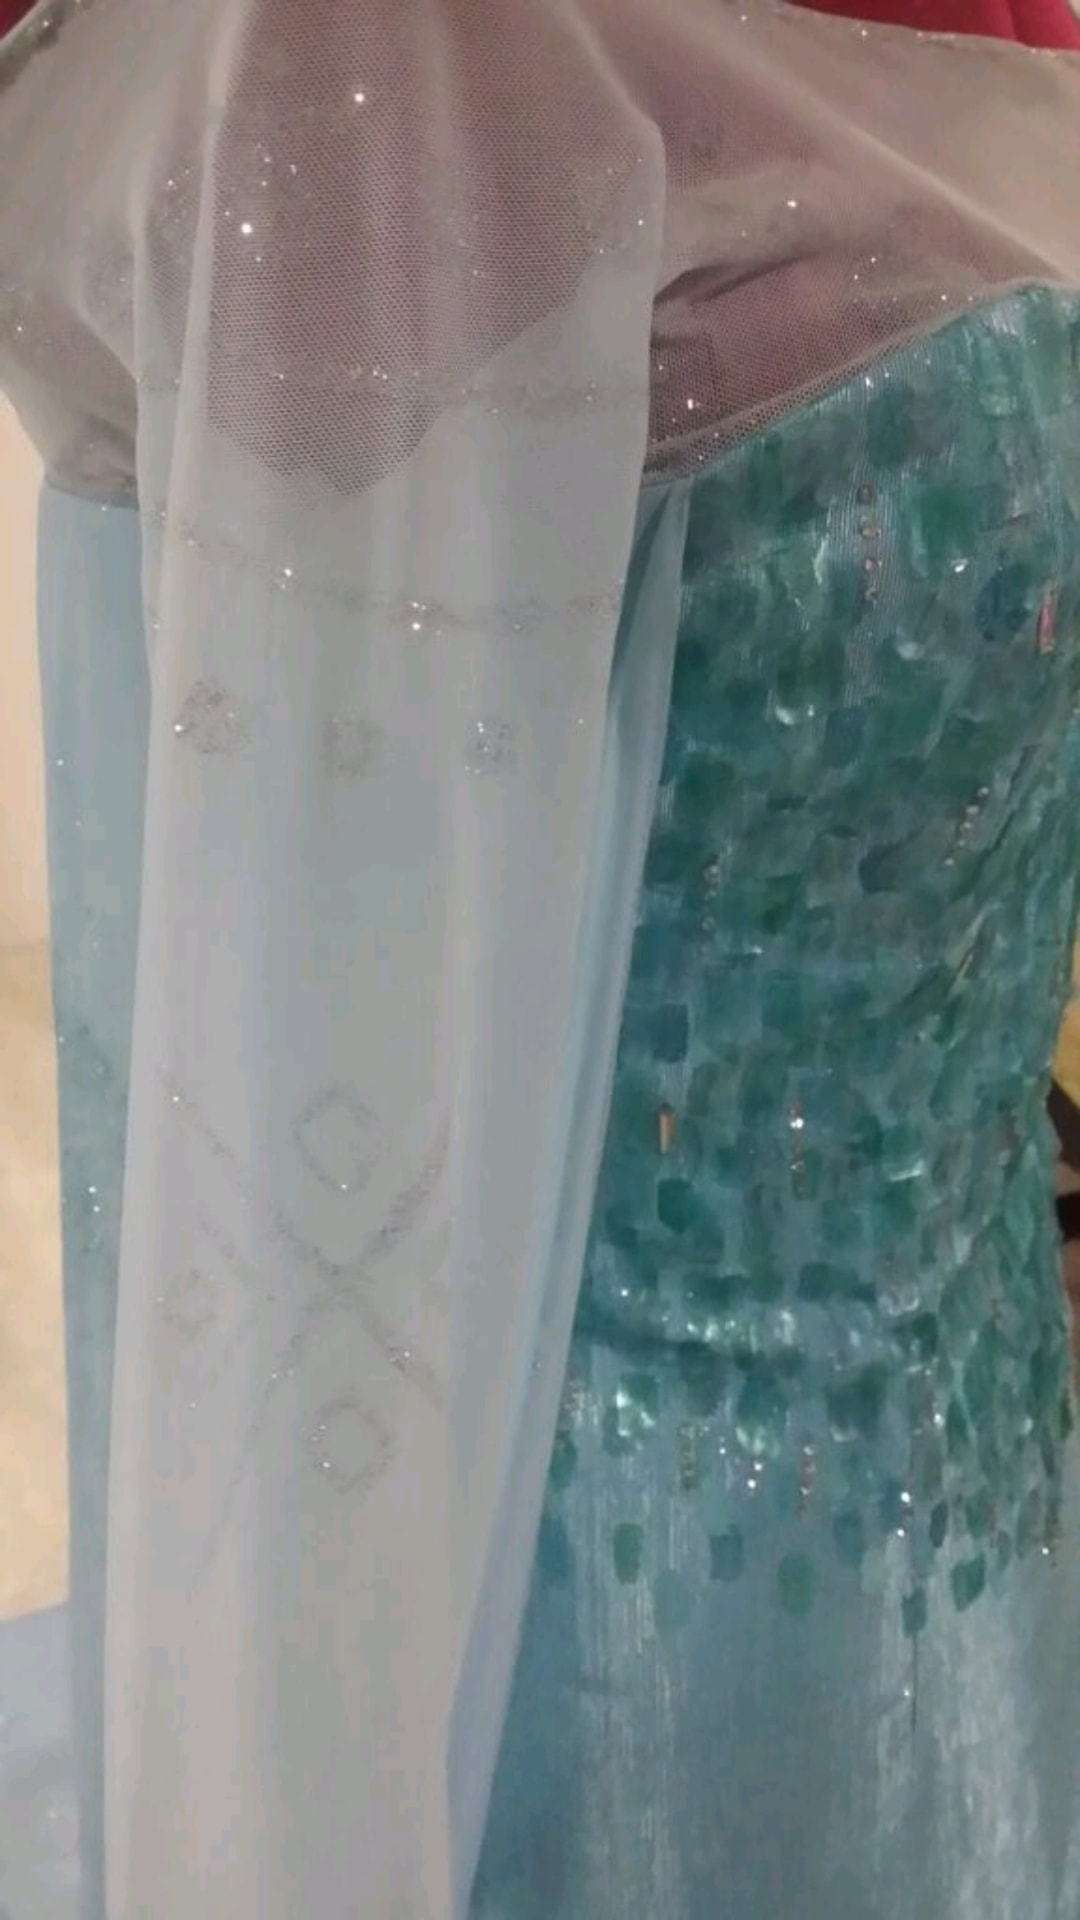
I also spent a lot of time working out how to make the gem like patterns on Elsa's bodice. I started with a metallic paint to draw out a foundation on the dress itself, painting rectangle after rectangle in the hopes of providing depth. On top of that I planned to use moldable plastic and form each tiny little gem before grouping them together, painting with the same metallic paints and sewing them down. You can see that this sort of worked initially. The moldable plastic allowed me to form the gems over the bust and bodice, but it was exceptionally time consuming, fiddly, and did not give a perfect, uniform look that I wanted.
|
The method was also bulky and quite difficult to layer and attach to the gown. I was planning on wearing this Elsa dress to a friends daughters birthday party, so I knew it had to be durable, which meant glue was not an option when it came to attaching these to the dress. I eventually discarded this idea and stumbled on a genius plan that made me cackle in delight.
|
|
Ladies and gentlemen, I give you...plastic! Something that I found at my local Spotlight store that I am sure is meant to be used to protect couches and tables from spilt drinks and gravy, this stuff solved all my problems. Well. All the dress related problems. Life was not solved through this discovery.
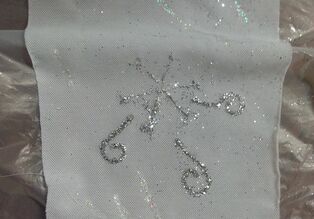
Cutting the plastic into the gem shapes was time consuming but relatively light labour wise. |
I then stuck them in rows onto fishing wire, creating line after line of 'gems' that could be easily painted with the glitter/metallic colours I had planned. I was then able to layer them over and over each other onto the bodice and stitch them down using the exposed fishing line that connected them as a catch to hold them. I should also note that at this same stage I added a tonne of hot glue crystals and a selection of metallic rectangle sequins, as you can see below.
|

|
|
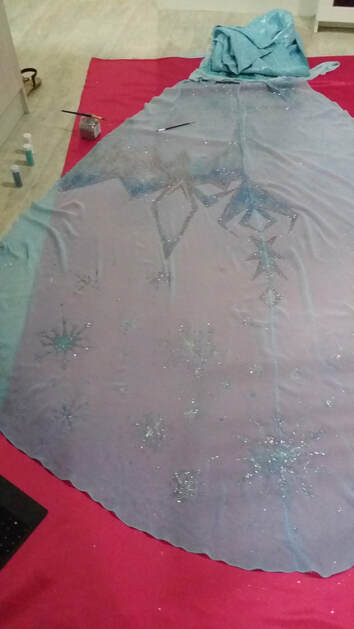
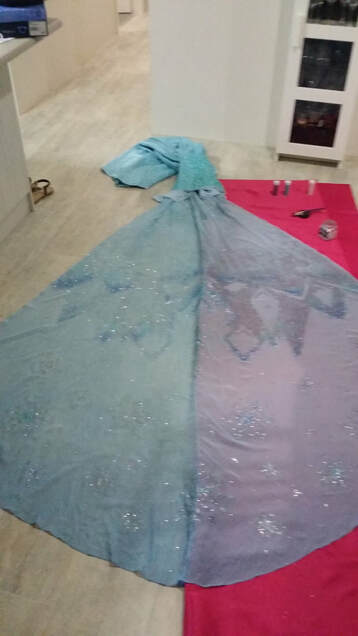
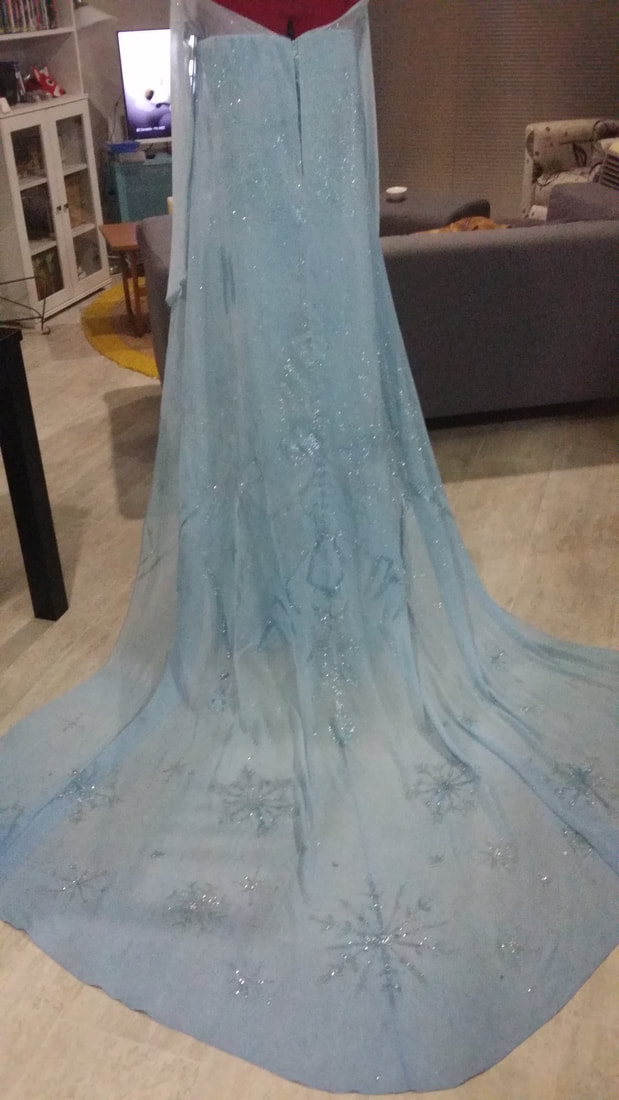
Moving on from the bodice (thank goodness) I constructed the train/cape and the sleeves. The sleeves were drafted from a leotard pattern using an extreme stretch mesh. I did this because I didn't want to have seams visable over the sleeves/upper bodice. The cape, as mentioned above, is made from chiffon. The whole dress is sewn together, so there are no separate pieces to it. Nothing detaches or has to be added. This makes it quite tricky to transport in some ways, but I really liked the look of it overall.

|

|
TA DAA! As you can see, it was coming along nicely. I was quite pleased. Now all that was left to do was the detailing. Ah, the detailing. All the glitter. ALL THE GLITTER!
|
I cannot begin to put an amount on the glitter I used on this. I tested it with glitter glue, then used a glitter on top of the glitter glue to make it more glittery, and I did this for the sleeves and the cape.
The cape is big. There was a lot of glitter. My dog shimmered when he walked. He was not impressed. |
|
|
|
BUT IT LOOKS GREAT! And I was DONE!
...with the dress...
...with the dress...
|
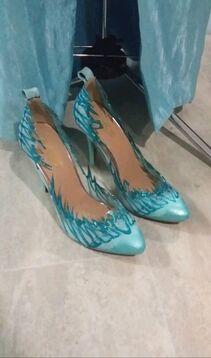
The shoes were a bit of a puzzle. I wanted to make something as close to the movie as I could, but a lot of the online options to buy didn't match the colour of my dress exactly, which as you may have guessed, is quite important to me. So I made my own. I found a pair of shoes on sale that were mainly plastic, traced out the designs I wanted on them, cut those designs into the plastic, then painted both with metallic paint and...you guessed it...glitter. I was pleasantly surprised with the outcome.
|
|
|
|
Finally...Hair. Hair was actually pretty easy. I bought a long white blonde wig and....dyed my hair to match. Yes, yes, I know. Extreme. But we have established that I am crazy and determined to get a picture perfect match to the character. Having dyed my hair, I trimmed away the hairline of the wig to make it a half wig, pinned and clipped it into my hair and styled the whole thing into a suitably Elsa like braid.
I added a few snowflake clips to the hair which I bought from ebay, having searched 'Elsa hairpins'. I am very creative with my search phrases. Such research. Much wow. |
|
|
|
|
And there you have if folks. Elsa dress. Now that you have gotten here. Scroll up to see the final product again. Or, if I haven't answered any questions you have, or there is something you're not sure about, head on over to the 'Talk to Me' page and drop me a line.
But, until then, until when, until we meet again...
But, until then, until when, until we meet again...