"We're not in Kansas anymore, Toto..."
Photography: Lata Photography - Location: Dymesbury Lodge - Animal Companion: Ned (As Toto) - A huge thank you to Kelly for your help!
THE MAKING OF...
So! I have always loved Dorothy from The Wizard of Oz, and the decision to make Dorothy my first 2020 costume came on New Years Eve as I sat around with friends and family considering the coming year. It occurred to me that I have this skill and desire to achieve something cosplay wise, yet do not have a whole lot to show for it. This pushed me to start on what I thought would be an easier cosplay, something to ease me into the year while I planned and schemed for bigger projects coming later down the line.
This was actually very wise, because Dorothy as a costume presented very few design and pattern making problems and came together quite quickly. It gave me a hit of gratification and pushed me to figure out what I was doing to the rest of the year.
This was actually very wise, because Dorothy as a costume presented very few design and pattern making problems and came together quite quickly. It gave me a hit of gratification and pushed me to figure out what I was doing to the rest of the year.
With that said, let's begin. I didn't take pictures of my calico draped toil, as I used the same method as I did in my Elsa dress and, frankly, I finished this costume in about a week, so I zoomed through a lot of the processes. Once the toil had been drawn over and the design I wanted marked, I cut it up and traced it straight onto the actual fabric.
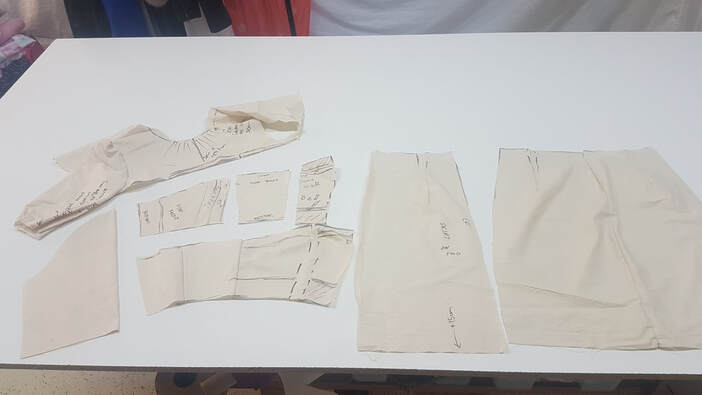
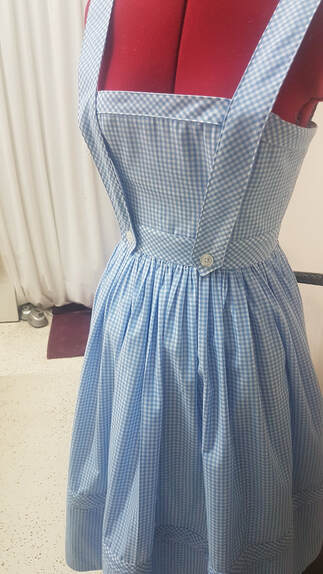
This is a form of pattern making that I tend to refer to as 'rough and ready'. For most projects I would have taken the time to re-do another toil to double check the fit, but as this was a spur of the moment kind of deal and I threw caution to the wind. The only point at which this decision let me down on this project was the density of gathers at the waist of the pinafore. The original costume had far less fullness than my remake and what I ended up with looks somewhat more 50's. I have to admit I'm not mad about that though. I really like the swooshiness of the skirt.
|
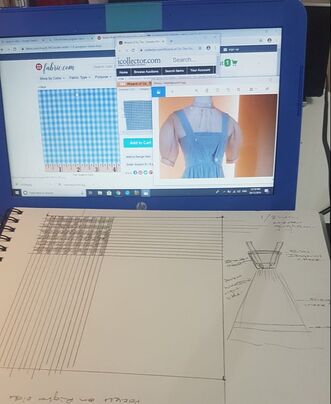
I suppose it would be a good time to mention that despite my devil may care attitude towards the cutting of this pattern, there were elements of this process that my usual perfectionist tendencies clung to like a lifeline on a sinking boat. For one, I spent a ridiculous amount of time watching videos and looking at images to get a mental picture of how the outfit was all going to fit together, calculating the width of waistbands and shoulder straps and gingham checks.
Yes, you read that right. I took the time to find an actual snapshot of the actual fabric from the actual 1939 dress, found its specs, drew it out and from that calculated the size my gingham checks were going to need to be. Need proof? Have a picture and never again doubt my insanity. |
|
From the point that the pattern was traced and cut onto actual fabric, the project progressed very quickly. I decided to add a layer of cotton to the bodice/straps/bias cut bands, as the gingham fabric I selected was quite lightweight and didn't have the structure or drape that I wanted for this project. I also decided to cut the bodice lining in actual fabric, no technical reason behind that, I just thought it looked nicer.
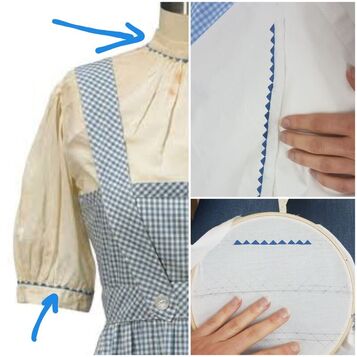
The bodice went together very easily, something I was grateful for, and I soon found myself coming up against what was by far the most fiddly aspect of this dress. The finishing strips, which are those bands of gingham on the dress that have the gingham pattern running diagonally instead of straight up and down, are cut on the bias (a fancy term for the diagonal grainline of your fabric). These bias strips make up the top binding of the bodice, the waistband, the skirt hem band and the straps.
I sat and puzzled over their size and construction for a while before taking them on.
I sat and puzzled over their size and construction for a while before taking them on.

|
I started with the hem. For this I decided to cut a strip of fabric on grain the length of the skirt, but measuring about 1/3 of the width of the skirt. I sewed this strip the hem, right sides together, before flipping it and pressing the seam closed. It is rather hard to explain, but by doing this and then stitching the strip of fabric down on the wrong side of the skirt panels, I ended up with a perfectly edged hem and a line to use as a guide when I attached the bias band around the bottom of the skirt.
I did all this before I gathered the skirt, so I was working on the flat. This made it much easier. Wow, re-reading that last bit it does not clearly explain what I did to finish this hem. I have tried to rephrase it several times, but given up. Hopefully the picture re this construction thingy makes what I did clearer than my botched attempt at the English language. |
Next was the Bias strip for the 1/3 point of the hem, where that convenient stitch line ended up as I mentioned before. It took the time to cut all of my bias strips at this point, making sure to back them all with a cotton layer (also cut on the bias) which was carefully basted to the actual fabric.
It is here that I make a humble recommendation. If you ever intend to do any sort of basting stitch for bias fabric and you choose to do it by machine:
It is here that I make a humble recommendation. If you ever intend to do any sort of basting stitch for bias fabric and you choose to do it by machine:
- a) Don't do it, you moron; and
- b) If you've ignored option a, pin the absolute monkies out of it, because that fabric will not do what you want it to.
|
|
Ahem. Once I had the bias strip for the hem basted, I pressed back the 1cm seam allowance on each side and pinned it to my skirt hem. Then I simply top stitched it down along the whole length of the skirt. I repeated the same process for the bias strip at the top of the bodice before gathering and attaching the skirt.
I waited until I had attached the gathered skirt to the bodice before top stitching on the waistband, simply because I wanted a very clean line and from the videos I had watched re the construction of the original dress, it seems that is the way they did it. |
|
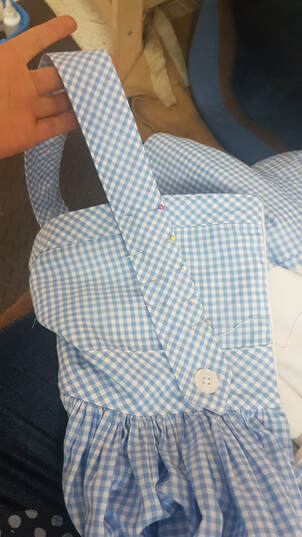
The straps of this dress, while using a very similar method, came together slightly differently. Instead of just pressing down a 1cm seam allowance on the band, I instead cut two sets of pairs and bagged the straps out so all of the edges were closed. I also finished their edges in triangles so they matched the pinafore straps on the original Dorothy dress. The straps were then top stitched and attached to the dress with buttons at the front and back.
On close inspection of a youtube video documenting Judy Garlands dress on display at a museum, I noticed that the straps had been attached to the bodice at the back from the waistline up. So...I did that too. OH! Ah, final note on this pinni. I closed it with an invisible zip. Initially I had thought I would close it with hook and eye fastenings as they had done on the movie dress, but when I gave that a shot I just didn't like it as much, so I deviated. As far as closures go, the hook and eye of the original dress was not a hill I was willing to die on...not today. |
|
|
With the pinni finished and swooshing like a dream, it was time to move on to the shirt, a great endeavour that I managed to get...practically no photos of. I am starting to see a trend with me a shirts. Every time I have made on I just don't take any photos.
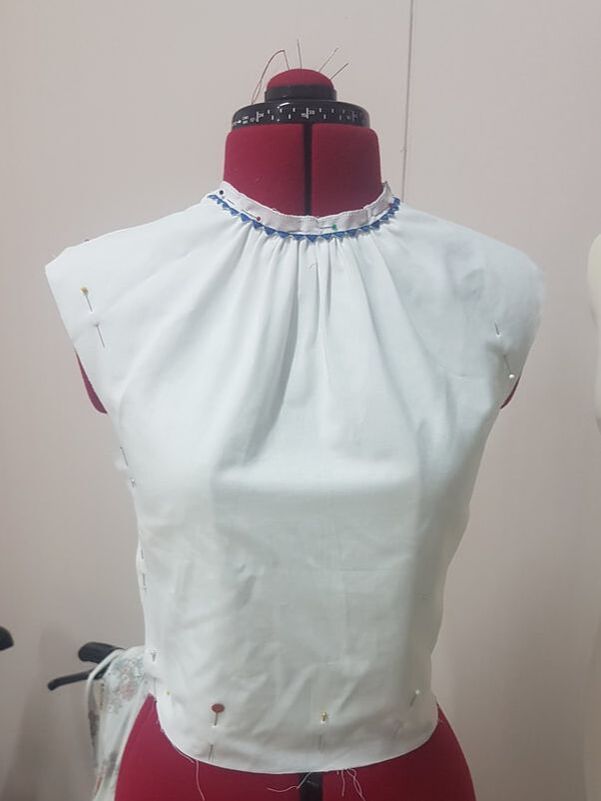
Maybe it's my absolute fear of sleeves. Those tricksy blighters are more complicated than they need to be and I have no idea why. Anyway, The pattern making for the shirt was remarkably simple and took me about fifteen minutes to work out. It harped back to my first year of study when the tutor was showing us how to pivot darts out of a pattern. I used that principle to widen the neckline, while keeping the waistline of the shirt a consistent width. If you'd like more info on how I did it, hit me up in the Talk to Me page and I will do a little tutorial. |
|
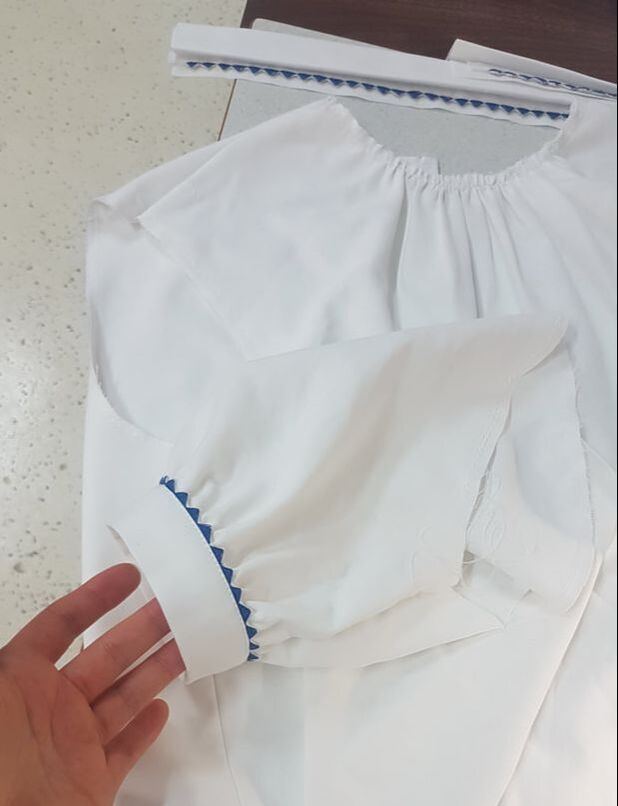
I should note that I cut doubles of the cotton fabric I used for the shirt. The fabric was a little see through and that was a look I was 100% going to avoid. This worked in my favour, as it meant I could cut what ended up being the 'lining' of the shirt front as a standard/normally shaped piece, then mount the gathered neckline to a more stable neck shape.... Ugh. I will get better at explaining this. I promise. For now, have more pictures of the shirt front gathered and ready to be stitched to the back. |

|
The real issue I ran into with this shirt, if I'm honest, was the trim. I looked everywhere, both in the interwebs and the physical world and had no luck finding little blue triangle trim. A lot of the youtubers, tutorials and bought costumes that I looked into had used something that was the right colour but not the right shape, and it just didn't sit well with me. I wanted to see my shirt finished with the same trim, and since I couldn't find anything...
I decided to make it. Because we all know I am odd.
I decided to make it. Because we all know I am odd.
|
This then raised the question of how to make the trim. I realised pretty quickly that I was going to need to embroider it, but as that was something I had never done before, it meant learning a new skill. Off I went to youtube again, and after several attempts, sizes and methods, I found one that yielded a result I could live with.
I drew out the draft on the same white cotton I was using for the shirt and went for it. It was probably the most time consuming element of this costume, but I'm really glad I did it. I think it lent a lot of authenticity to my cosplay. If anyone is interested, the triangles are 1cm wide and 4mm tall. |
I made enough of the trim to go around the collar and the cuffs of the shirt, then attached them to said collars and cuffs before the pieces were attached to the shirt. The cuffs and collars were just straight cut pieces of cotton measuring 8cm wide, lined with a interfacing before being folded over and pressed into halves. I then stitched them down in the same way you would if you were binding something.
The sleeves were drafted from my usual sleeve block with extra width added to accommodate the gathers. Again, if anyone is interested, let me know and I might put together a little tutorial on how to edit sleeve patterns.
After the shirt was put together, hemmed and trimmed to my satisfaction, I closed it with snap closures. I haven't ever closed a shirt like this before, but they did it in 1939, so I thought I would give it a try. Why not, right?
|
|

|
And finally we come to the bit that I think most people would be excited for.
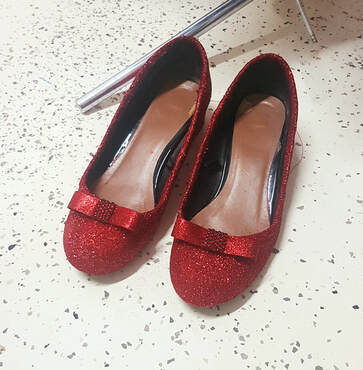
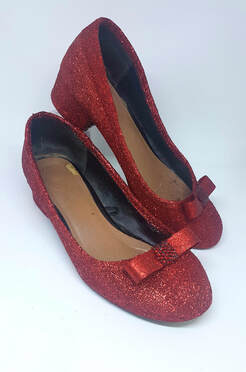
The Ruby Slippers.
So, the OG ruby slippers were done with sequins and gems, many many sequins and gem bows that sparkled like...well...rubies. Funnily enough, when it came time to do these shoes I wasn't all that keen on using sequins. I love the Judy Garland slippers, but I am very aware that I like actual glitter shoes more.
So, one guess to anyone reading this what I decided to do. Ding Ding Ding! Mod Podge, Glitter, Ribbon, Glitter, Gems, Glitter, Clear Gloss sealant and, you guessed it, GLITTER! Woop Woop!
|
|
|
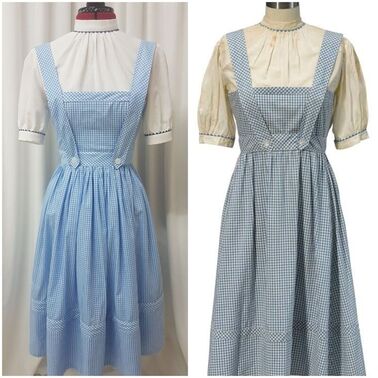
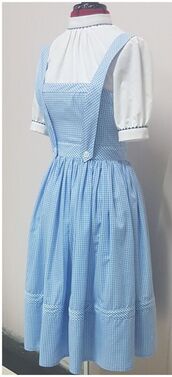
And there you have it! That's...everything. I've added a comparison picture, which makes me proud every time I look at it. I know there are differences. My waistline is lower, I think because I let my bodice finish at my natural waist and I am significantly taller than Judy Garland was when she took on the mantle of Dorothy. My skirt is also fuller, as previously mentioned, but I actually quite like it. My neckline is also a little higher and the collar wider, but again. I still like it. I hope you do too!
|
|
|
And now my friends, it is time for me to find myself a dog, borrow a basket and set off to follow the yellow brick road! Until next time...